
Gen 1 Hayabusa Build: Part 1 – Operation Specs
September 21 ,2011
Gen 1 Hayabusa Build: Part 1 – Operation Specs
This is an article I have wanted to write for a long time.
On the forums there is so much talk and speculation as to what a stock Gen 1 Hayabusa has for horsepower and what kind of mods you can do to make it have more. Obviously, there are plenty of modifications that can be made; the sky really is the limit. It has been said, “Horsepower cost money. How fast do you want to go?”
But what internal mods can the average person afford to boost the power without using power adders such as a turbo or NOS? While also trying to preserve the reliability of the engine?
Specs on the bike before the operation
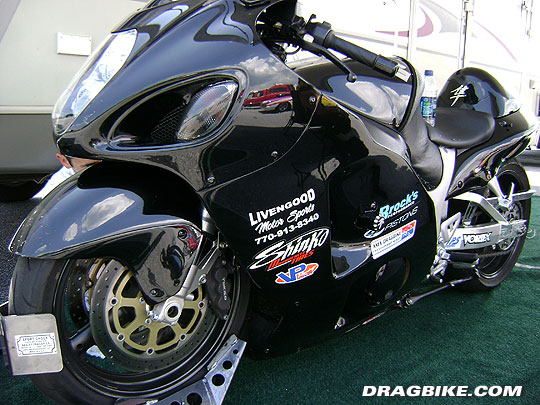
The guinea pig for this experiment is Paul Lee’s 2000 Hayabusa with 11,000 miles on it. Paul had brought this bike to Livengood Motorsports in early 2010 to have it tuned on the dyno. The bike had a completely stock motor with the exception of an Akropovic exhaust system and a PCII. It also had a 10” over swingarm with an airshifter. On this visit an NOS system was added and another map tuned for it but it was never used once installed as Paul did not have a PC to swap maps back and forth at the track.
The bike also has the stock air box with the modification where the door has been removed and a stock air cleaner. The PAIR valves are also intact.
On pump gas the bike had 159 horsepower after being tuned. (On a side note it had 177 hp with the NOS.)
I ran the bike in the Atlanta Dragway Summit points series for the second half of the 2010 season while my transmission was being worked on. The best run I was able to manage on it was a 9.71 at 142mph. I am sure if you put Jeremy Teasley or Keith Dennis on it you could run a better time, being I am neither one of them this will be a good reference point to measure against when the bike goes back to the track after the modifications are performed.
Surgery begins
The engine was extracted from the bike in my basement rec room much to Stephanie’s dismay as now there are two engineless Hayabusas next to the pinball machines.
Once Brian had the engine, he preceded to dismantle the engine completely.
Bearing inspection
Internally everything looked good. There was some wear on the rod bearings you would expect to see after 11K miles. Mainly in the tops and bottoms of the bearings where the most stress occurs.

The main bearings were fairly uniform in their wear with the exception of the 5th bearing which was noticeably shinier than the rest of them, yet not in any danger of spinning in the journal. I am sure there are some backyard builders who would use them again.


Transmission inspection
The transmission was beginning to show signs of wear in the 2nd and 6th gear area as you would expect to see in a drag raced Hayabusa. They were nowhere near the condition of the ones that were in my bike when failure actually did occur. My guess is another year or two was left before the problem should be addressed.
For those of you who are interested… I spoke with Mark Doucette at R&D Motorsports about what could be done if you were a budget racer and did not want to spend the money on a full blown Pro Street race transmission job.
Mark explained to me he did not want the whole transmission sent in but only the gears you wanted undercut. Mark said there is no way he could let the rest of the transmission go if he saw issues with it and only do a couple of gears off it. By sending in for instance 2nd and 6th he would magnaflux each ($7.50 each.) and undercut 2nd ($44.00) and 6th ($35.00). It was not about going after the racers wallet, but still being able to offer quality work even if it meant not being able to do the entire transmission. It makes sense to me. Why would you want to put your company’s reputation on the line because someone wanted you to only partially repair a transmission that may have other faulty parts?
Mark said that while you were in the engine it would be crazy not to at least do this.
Parts to keep
For this build the stock rods will be used. I have been told that a stock set of rods can withstand up to 300 HP by a turbo provided aftermarket pistons are used and as long as you do not go past the rev limiter. The rods are good with stock pistons for as much horsepower as you can make on motor only provided you do not go over redline. If you go past redline by 400 rpm they will fail around 200 hp.

The stock pistons will be also used in this build to keep costs down. I have not been able to nail down any horsepower numbers as to what the stock pistons can handle because most of the engine builders I have spoke to use CP Pistons, JE Pistons, Wiseco or MTC to name a few. The ball park guess without NOS or a turbo is around 220 hp or so.


The transplant
Paul Lee could only afford to have the very popular intake cam modification installed as well as have Brian clean up the castings in the intake and exhaust ports.

As most of you know the intake mod has been around since the Hayabusa came out. Basically you remove the exhaust cam and replace it with another intake cam. Horsepower gains as high as 12 hp have been claimed from just this mod alone, although I have not personally seen a before and after dyno graph to prove this as of yet.

This mod has also been made easier with a product that APE and Falicon offer, namely the adjustable cam gears. When you are in the engine doing this modification you may as well degree your cams. In order to do so you must have adjustable cam gears.
Degreeing the cams basically moves your power band. Where you choose to put them depends on where you want to make your power. In nearly every instance the goal is to put the power right up to redline.

Another area to pick up some horsepower is by blending the valve guides in the intake and exhaust runners as well as smoothing the factory casting marks. This allows air to move more freely and prevents unwanted turbulence. Interestingly enough, some turbulence has actually been found to be beneficial.
In the 80’s I worked for a business owner who used to own a drag race car. I remember he sent out the heads and intake to be “Ported and Polished” and had me go pick them up from the machine shop when they were finished. I looked inside and they were literally polished shiny smooth. It was thought at the time this helped air flow. What was later found out was the fuel actually stuck to the sides of the runners as a coating as opposed to being kept in the air as a vapor into the cylinders.
Nowadays if you look at a porting job from a CNC machine you will see small ridge like patterns. These actually cause turbulence creating a cushion of air along the walls keeping the fuel suspended in the air. If done by hand, coarse sand wheels are used to provide the same effect. After all, the goal is to get the fuel in the cylinders and not stuck along the walls of the head runners on the way there.

See ya at the track!
Paul Cavanaugh